Previous weeks work has been uploaded as well as any other pieces needed.
Deliverables
All files are located in the subdirectory of the project. The project should function as specified: When you visit the Personnel form page (frmPersonnel.aspx), a record should be saved in the tblUserActivity table with the IP address, form name accessed (frmPersonnel), and the date accessed. When you click the View Activity button, you should see at least one record with this information. When the user goes to the frmPersonnel web form and enters data, the following business rules are to be enforced.
- Fields may not be empty or filled with spaces. If any field is empty, turn that field background color to yellow and add to/create an error message to be shown in the error label.
- The end date must be greater than the start date. If the end date is less than the start date turn both date fields yellow and add to/create an error message to be shown in the error label.
If all fields validate properly, then the session state items should be set properly and the user should see the frmPersonnelVerified form with all the values displayed. You will also add a new item to frmMain that will take the user to the new frmUserActivity form you added. Add the proper link and a hyperlinked image to allow the user to select this new option. Once you have verified that everything works, save your website, zip up all files, and submit it.
STEP 1: Step Title
1. Open Microsoft Visual Studio.NET.
2. Open the PayrollSystem website by clicking on it in the Recent Projects list, or by pulling down the File menu, selecting Open Website, navigating to the folder where you previously saved the PayrollSystem, and clicking Open.
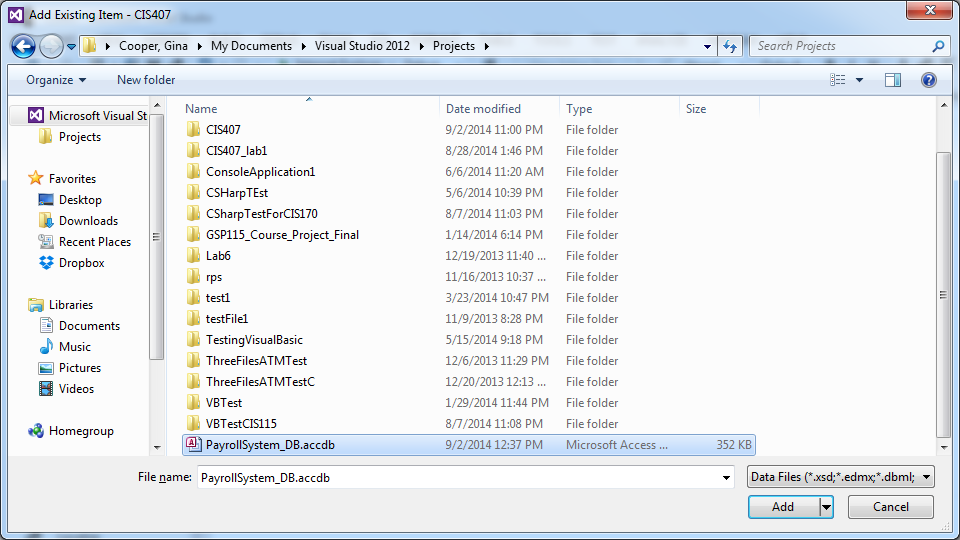
3. Download the PayrollSystem_DB.accdb file from the Files section and save it on your local computer. (Note: your operating system may lock or block the file. Once you have copied it locally, right click on the file and select Properties and then Unblock if available). Then add it to the PayrollSystem website as follows: In Visual Studio, in the Solution Explorer click Website, Add Existing Item, then navigate to the PayrollSystem_DB.accdb file you downloaded, and click the Add button.
Make sure you select file types, which include *.accdb, *.accdb, etc. Otherwise, you will not be able to see the database file to select.
4. Now we need to create a new connection to the PayrollSystem_DB.accdb. To begin, click View Server Explorer.
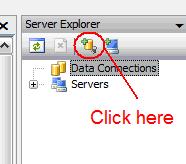
5. When the Server Explorer toolbox appears, click the Connect to Database button.
6. When the Add Connection dialog appears, click the Change button. In the Change Data Source dialog, select MS Access Database File; Uncheck Always use this Selection; then click OK.
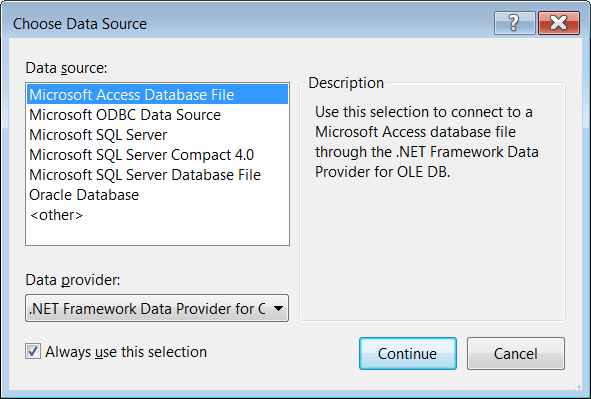
Press Continue to get the following screen.
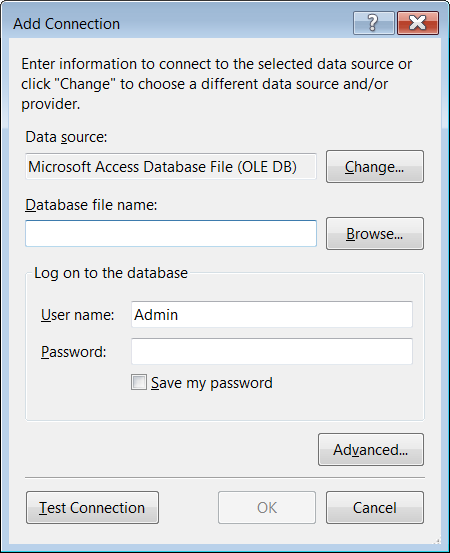
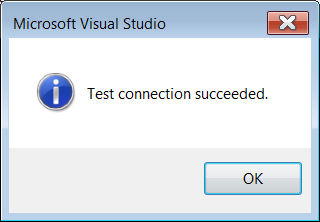
7. Click the Browse button to navigate to the PayrollSystem_DB.accdb file in your website folder, then click Open. (NOTE: Be sure you select the PayrollSystem_DB.accdb file in your PayrollSystem website folder, not the one you originally downloaded from the Files section). Click Test Connection. You should receive a message that the test connection succeeded. Click OK to acknowledge the message, then click OK again to close the Add Connection dialog.
8. The PayrollSystemDB.accdb should be added to the Server Explorer. Expand the database, then expand the Tables entry under the database until you see tblUserActivity. Leave the Server Explorer window open for now as you will be returning to it in a moment.
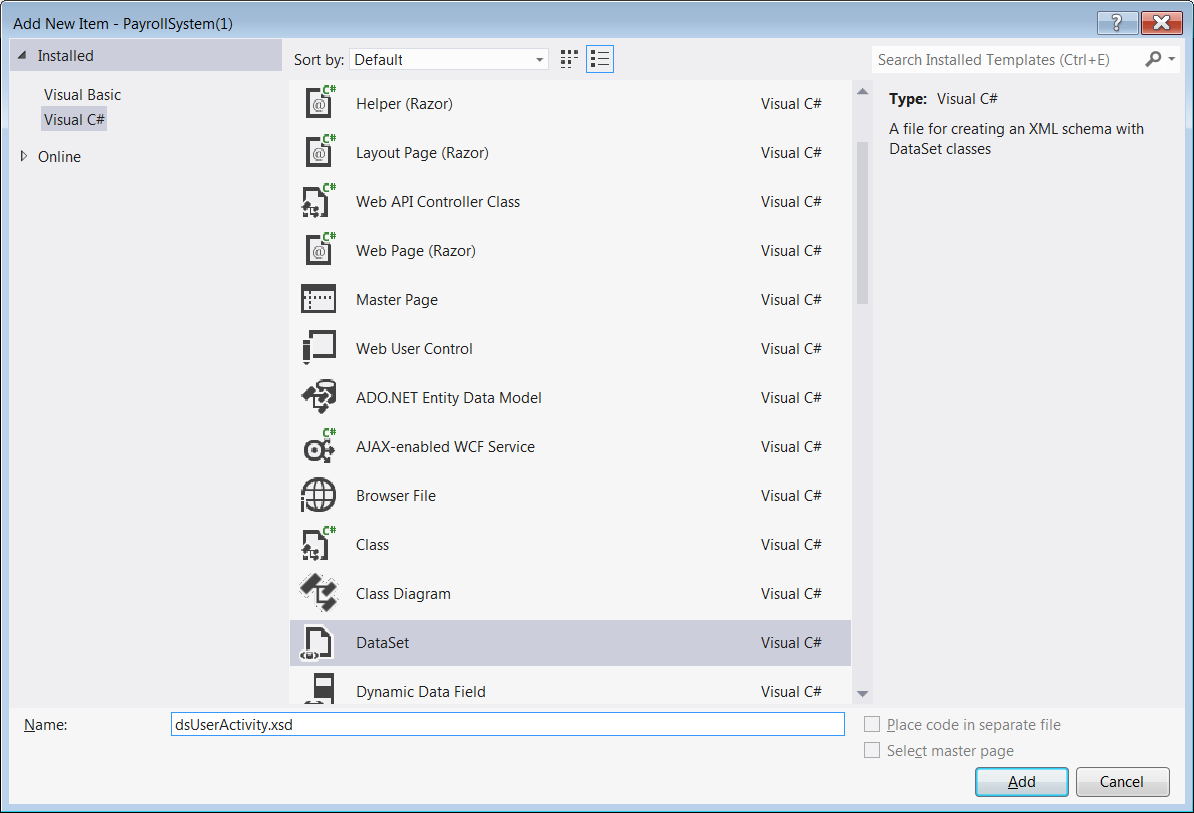
9. Create a new dataset by selecting Website-> Add New Item. Under Templates, select the Dataset item. Enter dsUserActivity.xsd for the name. Click Add.
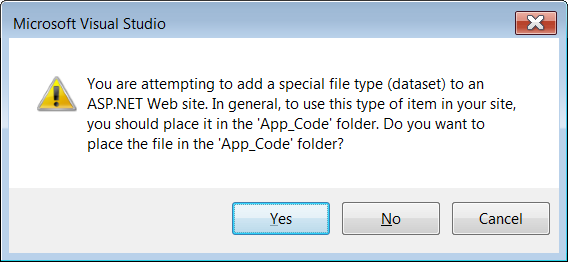
10. If the following message appears, select Yes. You want to make this dataset available to your entire website.
11. If the TableAdapter Configuration Wizard dialog appears, click Cancel. (We will be configuring a Data Adapter for this dataset later in C# code, so we do not need to run this wizard.)
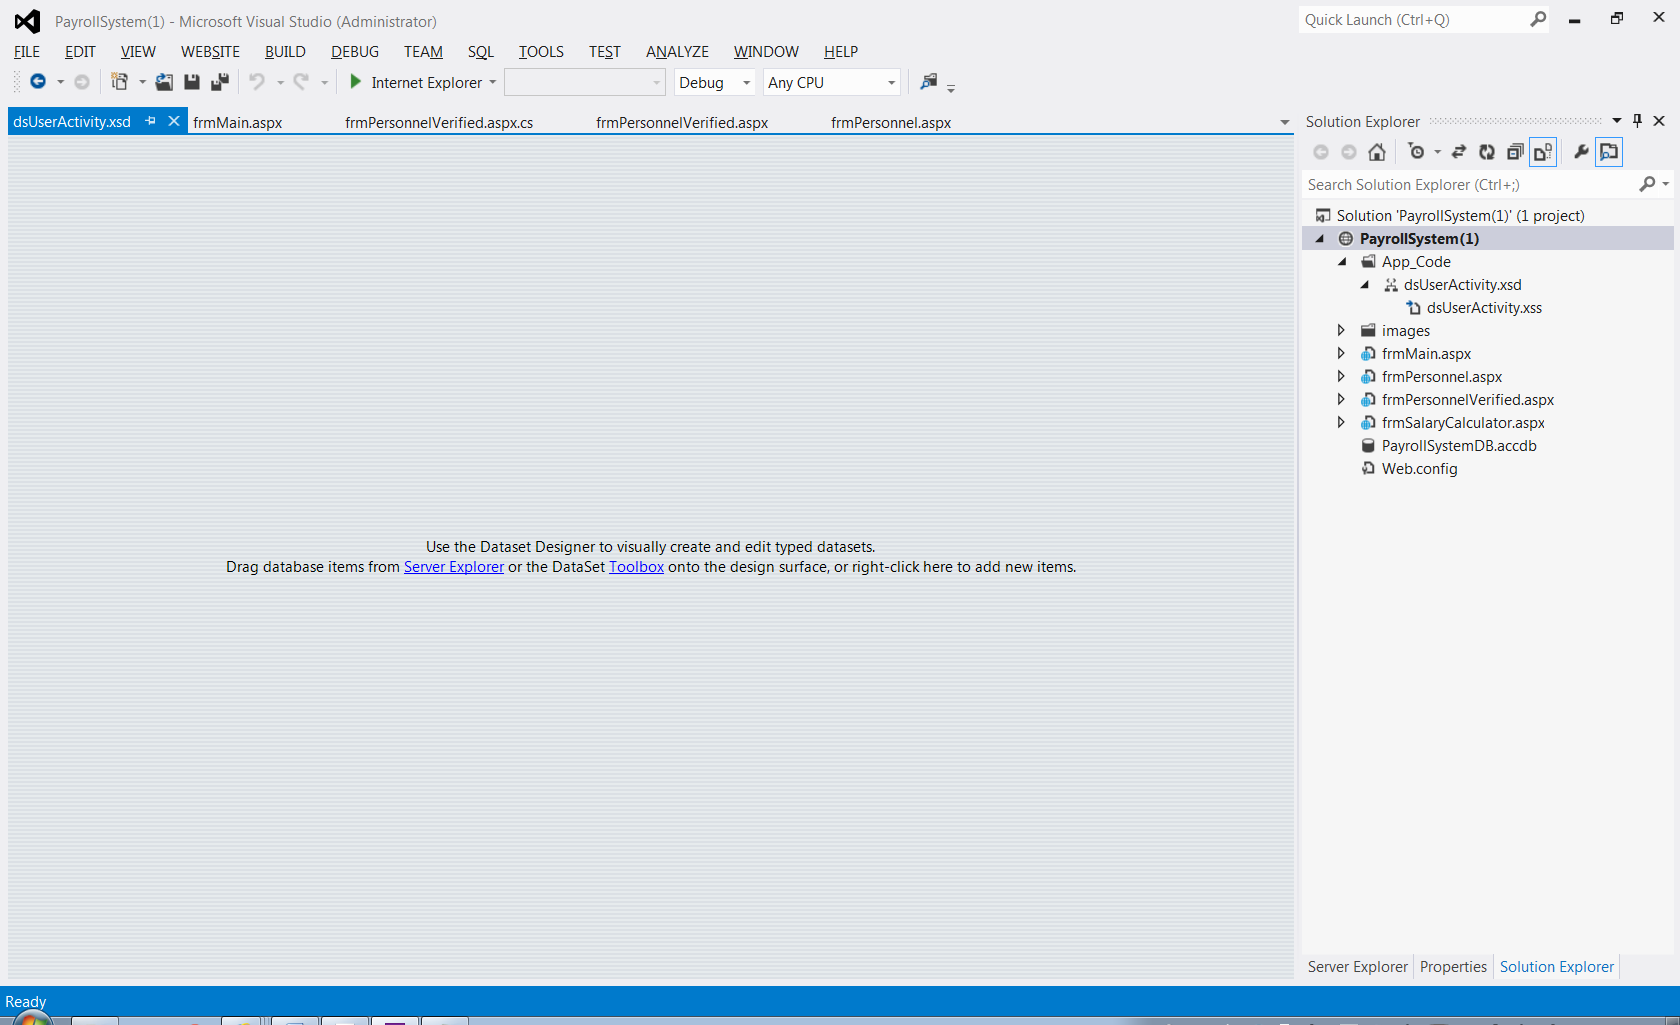
12. Drag-and-drop the tblUserActivity table from the Server Explorer window into the dsUserActivity dataset in the editor window.
NOTE: If you see a message that says your connection uses a local data file that is not in the current project, that indicates you did not select the correct PayrollSystem_DB.accdb file when you created your data connection. To fix this problem, click No, then right-click on PayrollSystemDB.accdb in the Server Explorer window and choose Modify Connection. Click the Browse button, navigate to the PayrollSystemDB.accdb file that is in your PayrollSystem website folder, and click Open. Test the connection, then click OK.
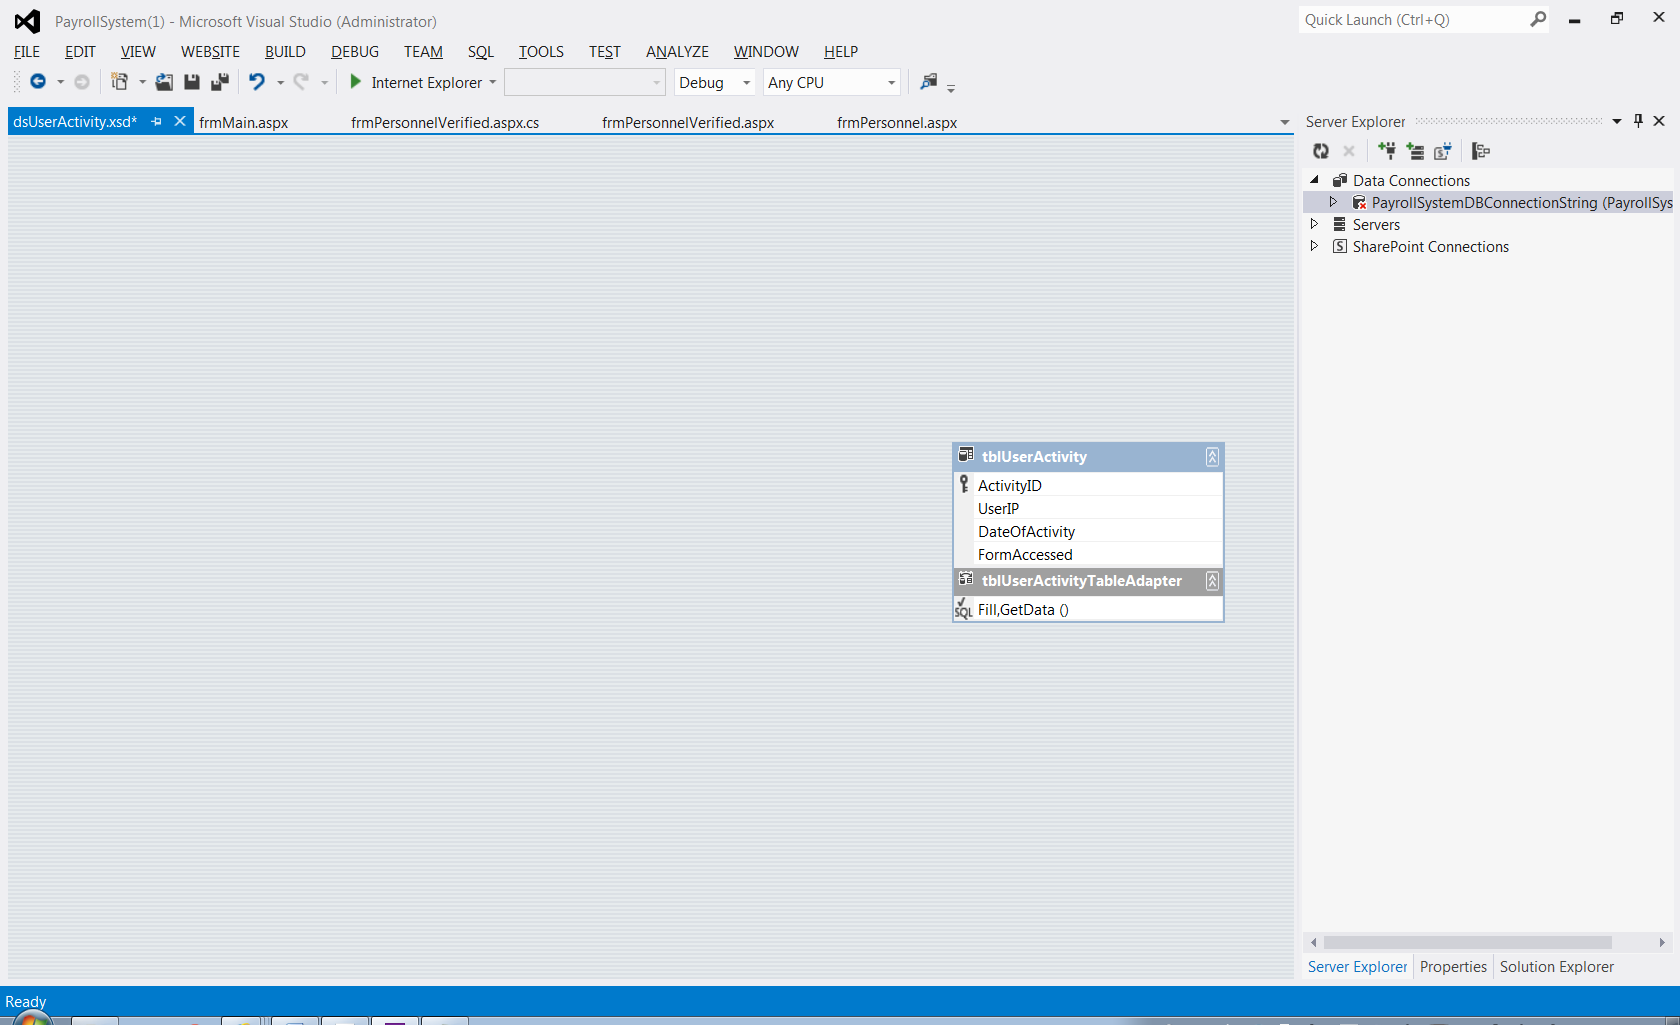
Click the Save icon on the toolbar to save the dsUserActivity.xsd dataset.
(You can now close the Server Explorer window if you wish.)
13. Create a new class to contain the C# code that will access this dataset. To do so, click Website, Add New Item. In the Add New Item dialog, select the Class template, and enter clsDataLayer for the name. Make sure the Language is set to Visual C#. Click Add.
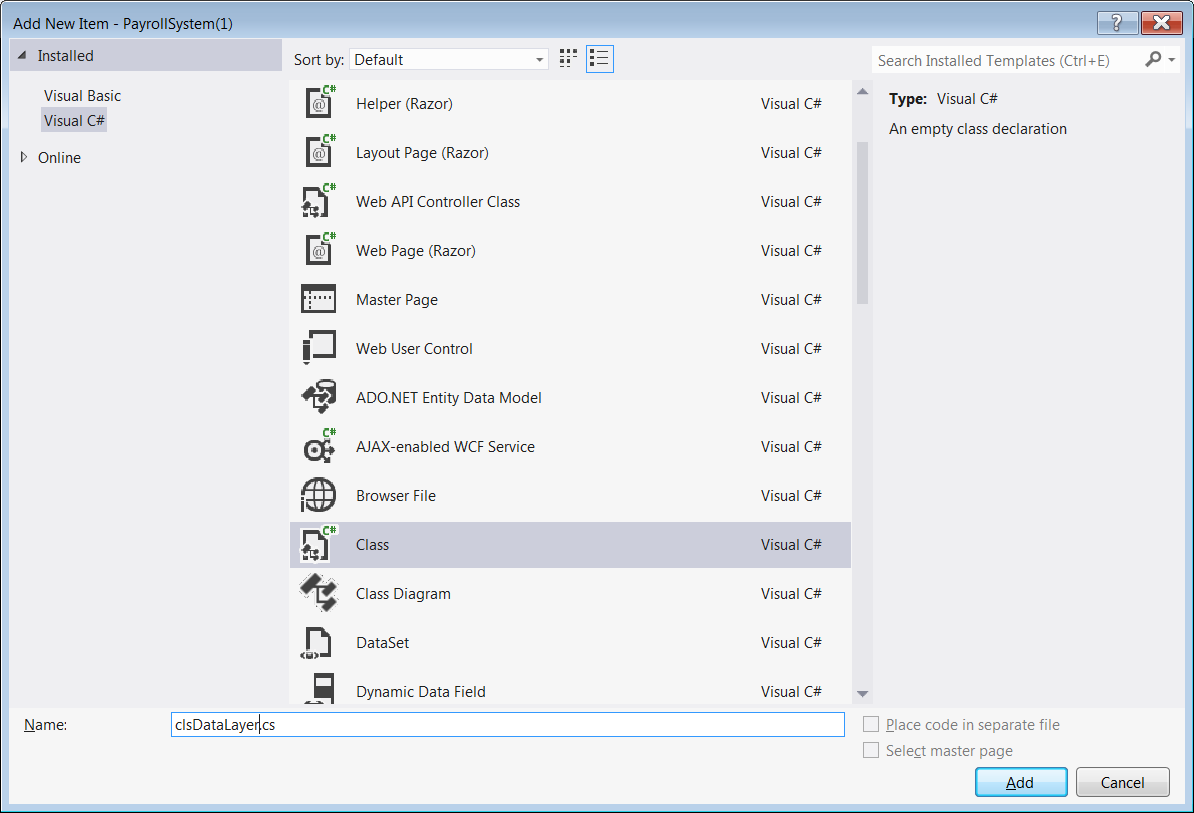
14. If the following message appears, select Yes. You want to make this class available to everything in your solution.
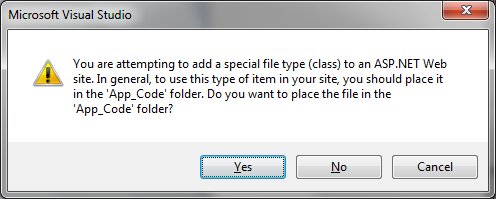
15. Add the following to the top of your class, below any other using statements created for you by Visual Studio.
Add to top of class
// Add your comments here


using System.Data.OleDb;


using System.Net;


using System.Data;
16. Add the following three functions inside the squiggly braces for the public class clsDataLayer class, above the beginning of the public clsDataLayer() constructor and save the class.
Class
// This function gets the user activity from the tblUserActivity


public static dsUserActivity GetUserActivity(string Database)


{


// Add your comments here


dsUserActivity DS;


OleDbConnection sqlConn;


OleDbDataAdapter sqlDA;


// Add your comments here


sqlConn = new OleDbConnection("PROVIDER=Microsoft.ACE.OLEDB.12.0;" + "Data Source=" + Database);


// Add your comments here


sqlDA = new OleDbDataAdapter("select * from tblUserActivity", sqlConn);


// Add your comments here


DS = new dsUserActivity();


// Add your comments here


sqlDA.Fill(DS.tblUserActivity);


// Add your comments here


return DS;


}


// This function saves the user activity


public static void SaveUserActivity(string Database, string FormAccessed)


{


// Add your comments here


OleDbConnection conn = new OleDbConnection("PROVIDER=Microsoft.ACE.OLEDB.12.0;" +


"Data Source=" + Database);


conn.Open();


OleDbCommand command  = conn.CreateCommand();


string strSQL;


strSQL = "Insert into tblUserActivity (UserIP, FormAccessed) values ('" +


GetIP4Address() + "', '" + FormAccessed + "')";


command.CommandType = CommandType.Text;


command.CommandText = strSQL;


command.ExecuteNonQuery();


conn.Close();


}


// This function gets the IP Address


public static string GetIP4Address()


{


string IP4Address  = string.Empty ;


foreach (IPAddress IPA in


Dns.GetHostAddresses(HttpContext.Current.Request.UserHostAddress)) {


if (IPA.AddressFamily.ToString() == "InterNetwork") {


IP4Address = IPA.ToString();


break;


}


}


if (IP4Address != string.Empty) {


return IP4Address;


}


foreach (IPAddress IPA in Dns.GetHostAddresses(Dns.GetHostName())) {


if (IPA.AddressFamily.ToString() == "InterNetwork") {


IP4Address = IPA.ToString();


break;


}


}


return IP4Address;


}
STEP 2: frmUserActivity, frmPersonnel, frmMain
17. Create a new web form called frmUserActivity. Switch to Design Mode and add the ACIT logo to the page as an ImageButton and link it back to frmMain. Below the image button add a panel. To the panel, add a Label and GridView (found under the Toolbox, Data tab) having the following properties.
PropertyValueLabel – TextUser ActivityGridView – (ID)grdUserActivity
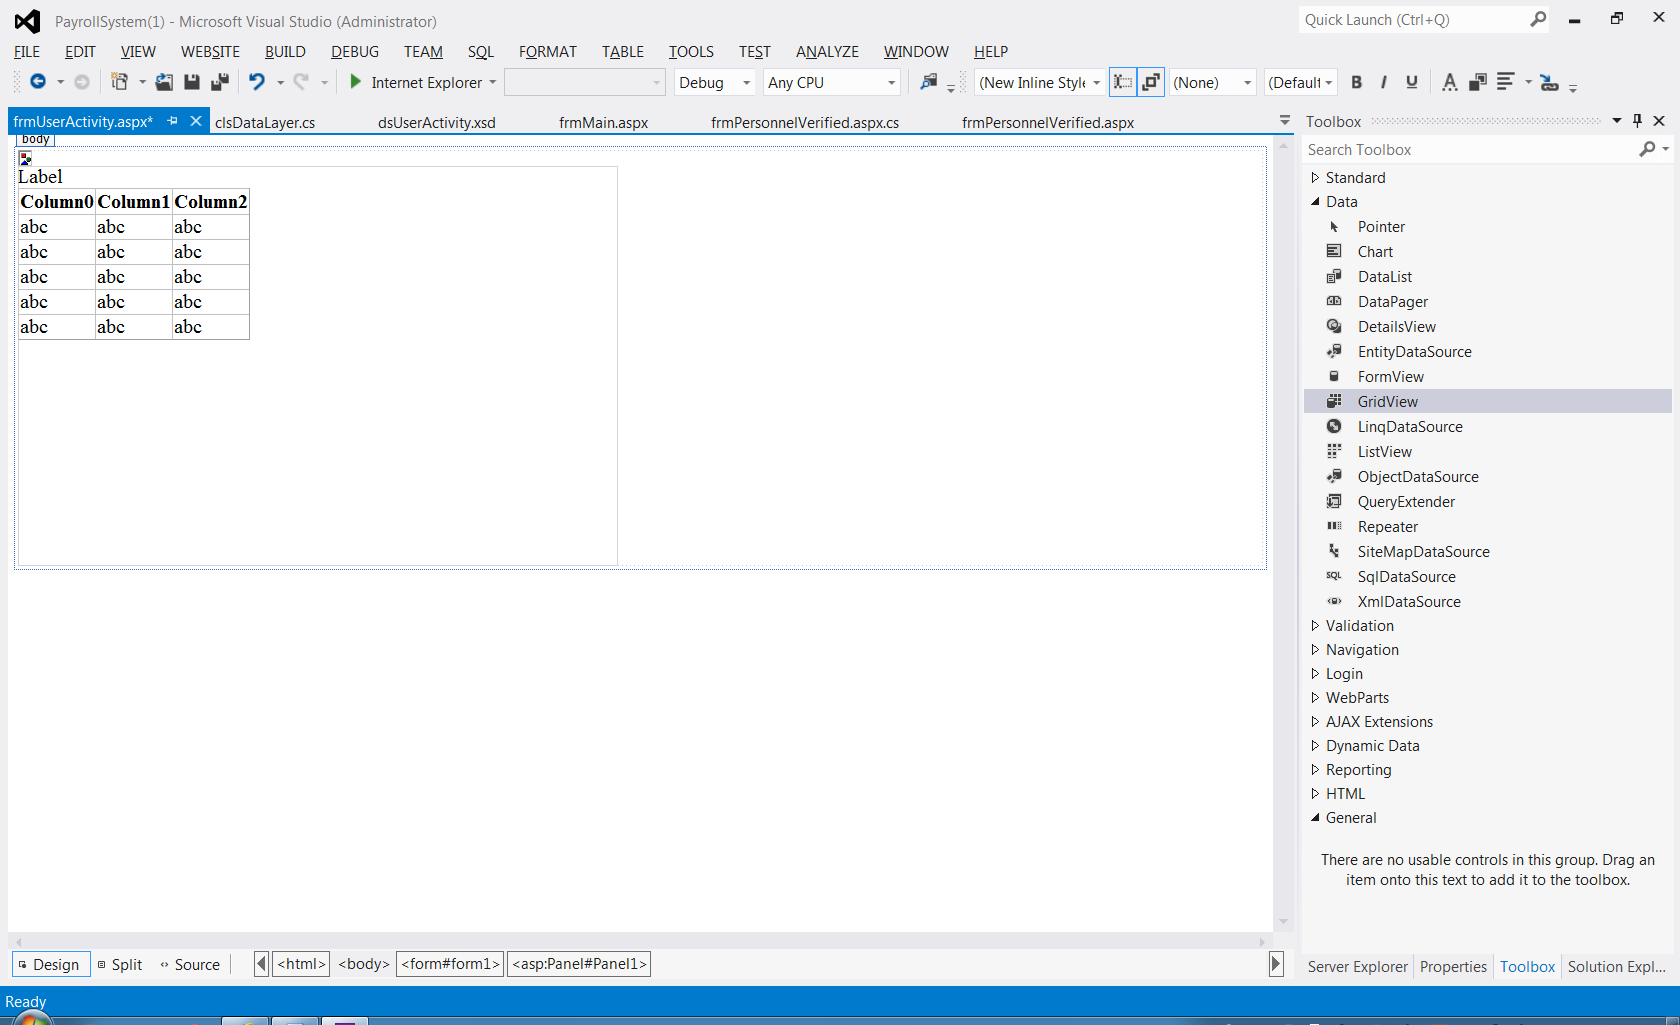
18. Go to the Page_Load method by double clicking an empty space on the page and add the following code.
Page_Load method for frmUserActivity.aspx
if (!Page.IsPostBack) {


// Declares the DataSet


dsUserActivity myDataSet = new dsUserActivity();


// Fill the dataset with what is returned from the function


myDataSet = clsDataLayer.GetUserActivity(Server.MapPath("PayrollSystem_DB.accdb"));


// Sets the DataGrid to the DataSource based on the table


grdUserActivity.DataSource = myDataSet.Tables["tblUserActivity"];


// Binds the DataGrid


grdUserActivity.DataBind();


}
19. Open the frmMain form, add a new link button and image button to point to the new frmUserActivity. Find an image to use for the image button and add the new option as View User Activity.
20. Go to the frmMain Page_Load and add the following code.
frmMain.aspx Page_Load code
// Add your comments here


clsDataLayer.SaveUserActivity(Server.MapPath("PayrollSystem_DB.accdb"), "frmPersonnel");
21. In the Solution Explorer, right click on the frmMain.aspx form and select Set As Start Page. Run your project. When you open the project, a record should be saved in the tblUserActivity table with the IP address, form name accessed (frmPersonnel), and the date accessed. When you click the View Activity button, you should see at least one record with this information.
23. You will now add server side validation code to the frmPersonnel page. Currently, when the Submit button is pressed, the frmPersonnelVerified page is displayed. This is because the frmPersonnelVerified page is set as the Submit button’s PostBackUrl property. Instead of having the page go directly to the frmPersonnelVerified page when the Submit button is pressed, we want to do some server side validation. If any of the validation rules fail, we will redisplay the frmPersonnel page with the fields in question highlighted in yellow with an error message displayed.
First, it is important to understand what is currently happening when the submit button is pressed. This is causing a postback of the form to the frmPersonnelVerified form. When this postback happens, all of the data in the fields on the frmPersonnel form are sent to the frmPersonnelVerified form as name value pairs. In the Page_Load code of frmPersonnelVerified these values are picked up from the Request object and displayed. Each name value pair will be in the Request object as the ID of the control containing the value and the value itself. We can pass data between pages by using Session state instead. In order to do validation on the values but still have the values visible on the frmPersonnelVerified page, we will need to change not only the PostBack URL of the frmPersonnel page but also how the frmPersonnelVerified form is getting the data—it will need to get it from Session state rather than from the Request object.
In order to do this, we will make the following changes.
- Clear the Submit button PostBackURL Property on the frmPersonnel form. Remove the value in the PostBackUrl that is highlighted.
- In the btnSubmit_Click event handler get each value from the data entry fields and set Session state items for each. (instructions below)
- Change the frmPersonnelVerified code behind to get the values from the Session state items you created in the previous step. (instructions below)
When you are done with these steps, you should be able to enter data on the frmPersonnel data entry form and then click the Submit button. The frmPersonnelVerified page should then be displayed with the values that were in the data entry fields on frmPersonnel.
23. Add a label to the frmPersonnel form with an ID of lblError. Do not place the label to the right or left of any of the controls on the form. Add it below the controls or above the controls. The text property of this label should be set to an empty string.
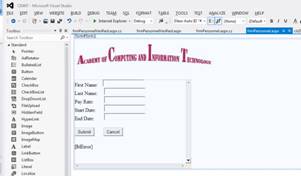
24. Add code to perform server side validation in response to the submit button being clicked. Here are the business rules we want to enforce (remember this will be server C# code in the frmPersonnel code behind): Fields may not be empty or filled with spaces. If any field is empty, turn that field background color to yellow and add to/create an error message to be shown in the error label. The end date must be greater than the start date. If the end date is less than the start date, turn both date fields yellow and add to/create an error message to be shown in the error label. If all fields validate properly then the session state items should be set properly and the user should see the frmPersonnelVerified form with all the values displayed.
frmPersonnel.aspx Lab Hints
1. The server side validation should be in the Submit button’s event handler. There is a Trim method on the string object that will automatically remove spaces from the beginning and end of a string. To test if txtFirstName is empty or filled with spaces, use the following code.
if (Request["txtFirstName"].ToString().Trim() == "")
2. To set the background color of the txtFirstName field, use the following code.
txtFirstName.BackColor = System.Drawing.Color.Yellow;
3. To set a value in session state and redirect the response to the frmPersonnelVerified.aspx do the following. txtFirstName is the key and txtFirstName.Text is the value.
Session["txtFirstName"] = txtFirstName.Text;


//Need to set session variables for all text boxes


Response.Redirect("frmPersonnelVerified.aspx");
4. You may want to create variables to work with for validation rather than using the Request item objects directly.
To turn a string into a DateTime object you can use the DateTime method Parse. If you had a date value stored in a string called strDate, you could turn it into a DateTime object like this.
DateTime myDateTimeObject = DateTime.Parse(strDate);
You can compare two DateTime objects by using the DateTime.Compare method. If you had two DateTime objects called dt1 and dt2 you can check to see if dt1 is greater than dt2 by doing this.
if (DateTime.Compare(dt1,dt2) > 0)
DateTime.Compare will return a 0 if the two dates are equal, a 1 if dt1 is greater than dt2, and a -1 if dt1 is less than dt2.
If you put in an invalid date for either of the date fields, you will get an exception/server error when trying to parse the values. We will address this in a later lab—for now make sure you enter valid dates (valid meaning a date in the form of mm/dd/yyyy).
5. An example of the code you might want to use to test if the end date is after the start date follows.
DateTime startDate = DateTime.Parse(Request["txtStartDate"]);


DateTime endDate = DateTime.Parse(Request["txtEndDate"]);


if (DateTime.Compare(startDate, endDate) > 0)


{


txtStartDate.BackColor = System.Drawing.Color.Yellow;


txtEndDate.BackColor = System.Drawing.Color.Yellow;


Msg = Msg + "The end date must be a later date than the start date.";


//The Msg text will be displayed in lblError.Text after all the error messages are concatenated


validatedState= false;


//Boolean value - test each textbox to see if the data entered is valid, if not set validState=false.


//If after testing each validation rule, the validatedState value is true, then submit to frmPersonnelVerified.aspx, if not, then display error message


}


else


{


txtStartDate.BackColor = System.Drawing.Color.White;


txtEndDate.BackColor = System.Drawing.Color.White;


}
Remember to clear the PostBackURL property of the Submit button!
frmPersonnelVerified.aspx Lab Hints
When using the Session state in frmPersonnel.aspx for txtFirstName, you used the following code: Session[“txtFirstName”] = txtFirstName.Text;
To get this same value back from the session we use the key and the Session object in the Page_Load of frmPersonnellVerified.aspx (instead of using Request, use Session) as follows.
Session["txtLastName"].ToString()
STEP 3: Verify and Submit
23. View the video above on what functions your lab should have so far.
24. Run your project. When you open the project and go to the main menu form a record should be saved in the tblUserActivity table with the IP address, form name accessed (frmPersonnel), and the date accessed. When you click the View Activity button you should see at least one record with this information. The validation and error display should work for entering data. All navigation and hyperlinks should work.
Once you have verified that it works, save your project, zip up all files, and submit it.
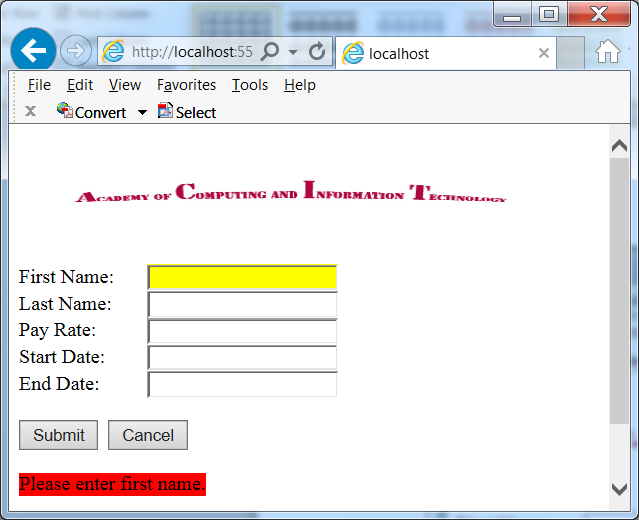
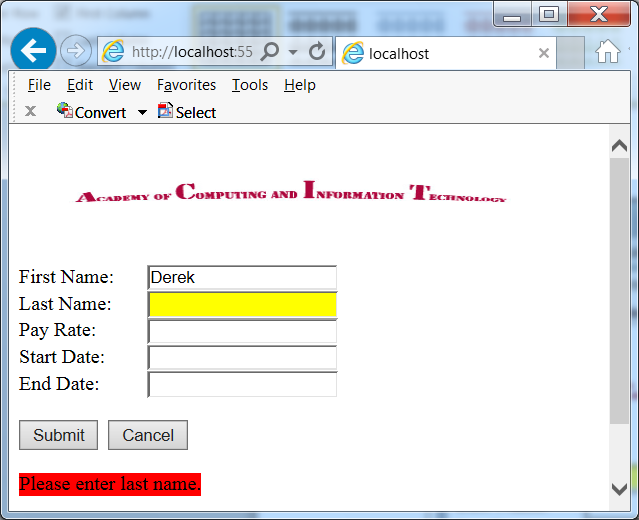
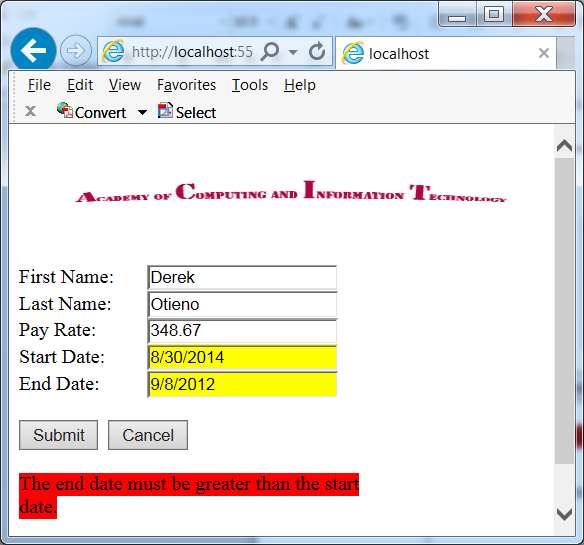
NOTE: Make sure you include comments in the code provided where specified (where the ” //Your comments here” is mentioned) and for any code you write, or else a five-point deduction per item (form, class, function) will be made. You basically put two forward slashes, which start the comment; anything after the // on that line is disregarded by the compiler. Then type a brief statement describing what is happening in the following code. Comments show professionalism and are a must in systems. As a professional developer, comments will set you apart from others and make your life much easier if maintenance and debugging are needed.


